I found this fabric on clearance at fabric.com a while back, and thought it would be perfect for N!
Samantha specifically requested ruffles on her dress, and pockets on the sides. I made the Geranium dress (again!), with some mods. I did the option for the ruffled sleeve, but I made it with the cap sleeve choice. I ruffled the skirt instead of making pleats (pleats are my preference!) but added in the inseam pockets that the pleated skirt offers (I traced the pocket separately on a sheet of paper, and laid it to the side of the skirt pattern when I was cutting it out) and cut extra fabric to make a ruffle at the bottom. I also added length, as she is going through a growth spurt.
It was nice to make changes to a pattern, and understand enough about what I am doing for them to come out correctly!
Thursday, January 30, 2014
Monday, January 27, 2014
Modern HST Quilt-a-Long Finish!
This is it - the last post in our Quilt-a-Long! I can't believe we are finally done! It was very strange not to write a block post yesterday! Today I wanted to share with you how I chose to assemble my quilt top.
I decided to use red for my sashing and borders - I wanted each block to stand out, and I love black/white and red. I used just under 3 yards - and I prewashed my red, just in case. Each sashing piece is 2.5"x8.5". I used black for the cornerstones - each one is 2.5"x2.5". I am not usually a border person, but again, I felt like this quilt needed one small border to frame the blocks. The border is 2.5"xwidth and length of the quilt.
I really really love the way my quilt came out. I learned a lot - two of these blocks have small mistakes in them, but for the life of me I couldn't remember (or find!) the errors - so I am living with them! And I learned that consistency is very important - these blocks were sewn on 4 different sewing machines - each with a just slight difference in a scant 1/4" seam - which means some of the points are cut off on some blocks, but again - I am living with it!
I have no idea how I will quilt this one, and since I have run out of my giant roll of batting, I don't have to worry about that until I get more! I will be sure to post a picture when it is finally complete.
So far there is one completed quilt top in the flickr group - I love the variety of colors in the blocks and how it looks so different with no sashing - gorgeous! Be sure to share yours if you finish!
Thanks for sewing along with us! And if you joined in late, don't worry, I will leave the posts up indefinitely!
Friday, January 24, 2014
MQG Riley Blake Challenge
I am really excited about my finished item for the MQG Riley Blake Challenge!
I used the x + block to make four scrappy blocks, and sewed them together for my pillow front. I quilted it with straight lines 1/4" apart. For the back, I used more of the grey, and did a hidden zipper (because all I had that would fit was UGLY!) which was quite fun.
I really like the bright colorful prints from this challenge, and I like the scrappy look the different prints and colors provided. This is a breath of fresh air in my living room
Thursday, January 23, 2014
M is for Monkey
We had too many ideas for M, but it came down to the outfit being due right after school started, so mom ordered some fabric and whipped up a skirt.
I feel badly making so many skirts (it feels like cheating), but she loves them and really does wear skirts more than anything else.
I used a cute Ann Kelle print - she was very excited that it was pink! :)
I feel badly making so many skirts (it feels like cheating), but she loves them and really does wear skirts more than anything else.
I used a cute Ann Kelle print - she was very excited that it was pink! :)
Wednesday, January 22, 2014
WIP Wednesday
I've done a bit of cutting and piecing this week, in between coughing fits, and dealing with sick kids. Blech.

I'm ready to assemble the blocks on my gift quilt.

I cut all the pieces for my solids quilt for the FWMQG Solids Challenge.

And Saturday, during baby's awesome nap, I basted four quilts! Now to have the energy to quilt them!
Tuesday, January 21, 2014
Tokyo Subway Map Quilt
I am so so so excited to have this one finished!
I worked on this full steam this fall, and then it sat waiting to be finished until I was done with gifts. I finished binding it on New Year's Eve - one last 2013 finish!
I used Remix rainbow stripe for the back, and Remix chevron for the binding - I wanted to continue the rainbow 'theme' of the front. I quilted 1/4" away from the 'lines' on the outsides of the 'lines.' I think I might like it to have more quilting, but I'm not sure what else I would do besides more straight lines.
My favorite part is probably looking at all of the small scraps left over from previous projects - such fun finding them!
This is my new favorite quilt to snuggle under this winter! I highly recommend this pattern if you like to piece tiny squares! (my favorite!)
Monday, January 20, 2014
Modern Half-Square Triangle Quilt-a-Long Block 72
Welcome! If you are just joining us, information about materials can be found here, and here are the previous blocks: Block 1, Block 2, Block 3, Block 4, Block 5, Block 6, Block 7, Block 8, Block 9, Block 10, Block 11, Block 12, Block 13, Block 14, Block 15, Block 16, Block 17, Block 18, Block 19, Block 20, Block 21, Block 22, Block 23, Block 24, Block 25, Block 26, Block 27, Block 28, Block 29, Block 30, Block 31, Block 32, Block 33, Block 34, Block 35, Block 36, Block 37, Block 38, Block 39, Block 40, Block 41, Block 42, Block 43, Block 44, Block 45, Block 46, Block 47, Block 48, Block 49, Block 50, Block 51, Block 52, Block 53, Block 54, Block 55, Block 56, Block 57, Block 58, Block 59, Block 60, block 61, Block 62, Block 63, Block 64, Block 65, Block 66, Block 67, Block 68, Block 69, Block 70, Block 71.
Create your blocks, following the same procedure as last week. If you need help making your blocks, please see this post. You should end up with 16 2.5" squares. Ready to lay out your block? Here we go!
After you have sewn your squares into rows, press your seams. I like to press odd numbered rows to the left, and even to the right. It helps to use a small piece of paper to number your rows. I like the tiny post-it notes.
After pressing, you are ready to sew your rows together! Pin, if necessary, but I find that these short rows don't require pinning.
Press one final time, and voila! Another finished block! We are all done!!! Remember to add your blocks to our flickr group!
I will do a wrap up post next week, with ideas about sashing, and quilt top assembly! Can't wait to see them all!Please, if you have questions, email me at knitnlit AT gmail DOT com, or make sure you leave your email address in your comment. I've had several folks ask questions in the comments, but if you are a no-reply commenter, I can't email you back.
Materials:
8 3.5" squares of Color A
8 3.5" squares of Color B
*note* these are the essential materials for each block, so you can cut several blocks worth of fabric at once to save time!
8 3.5" squares of Color A
8 3.5" squares of Color B
*note* these are the essential materials for each block, so you can cut several blocks worth of fabric at once to save time!
Create your blocks, following the same procedure as last week. If you need help making your blocks, please see this post. You should end up with 16 2.5" squares. Ready to lay out your block? Here we go!
ROW 1
ROW 2
ROW 3
ROW 4
After pressing, you are ready to sew your rows together! Pin, if necessary, but I find that these short rows don't require pinning.
Press one final time, and voila! Another finished block! We are all done!!! Remember to add your blocks to our flickr group!
I will do a wrap up post next week, with ideas about sashing, and quilt top assembly! Can't wait to see them all!Please, if you have questions, email me at knitnlit AT gmail DOT com, or make sure you leave your email address in your comment. I've had several folks ask questions in the comments, but if you are a no-reply commenter, I can't email you back.
Sunday, January 19, 2014
2014 Goals
I don't have a lot of pretty pictures to share with you, but I wanted to record my goals, so that I would have them in writing! :)
Quilts:
Swoon
Wedding Gift
Finish modern half square triangle quilt
Complete all the FWMQG Challenges
Make quilts for gifts
Sewing:
Sew project bags for myself
Make a Super Tote for me (just need to decide on an exterior print)
Make a cover for my Nook
Continue to sew clothes for the Sew All 26-along
Make Ben some clothes
Make Ellie some new clothes
New pillow covers
Knitting:
Finish Tangled Yoke
Finish Must Have Cardigan
Finish some socks for Hubby
School Sweater for Samantha
Sweater for Ben
Finish aran sweater for Henry
Hat for Me
Color Affection for Me
Other:
Finish some started cross-stitch projects
LABEL MY QUILTS!!
What are you planning for this year?
Saturday, January 18, 2014
L is for Leaves
When I found this print on sale, I knew it would be perfect for L!
(Sorry for the crummy indoor photo - it was cold and rainy all day that day!)
I used the After School Shirt pattern again, and lengthened the sleeves and body - her other shirt from last year fits well through the chest, but it is getting too short. Hopefully she will be able to wear this one for a while.
I also made her a ladybug skirt, but somehow managed to not get a picture on the day she wore it. I had to talk her out of wearing it with her leaf shirt! (The skirt is blue and red and pink!)
Almost halfway through the alphabet!
Friday, January 17, 2014
Star Cluster: A Wonky Star Block Tutorial
Hi! This tutorial is for the first block in our guild's BOM for 2014. I love the way this one came out, and I hope you all like it!


Materials: 33 squares for background, 3 squares for star centers, and 4 squares for each star (12 total). You can choose if you want your stars to have different colored centers. My block measures 18.5", but you can easily size your block down if you prefer.
To get an 18.5" block, cut your squares to 3.5". If you prefer a 12.5" block, cut them at 2.5"
Using your rotary cutter, cut all of the squares for your star points in half on the diagonal.
Place one triangle on a background square, right sides facing. This is where your 'wonky' come in - you can place it at any angle you like, just be sure that after you sew a 1/4" seam your star point covers your background fabric.
Repeat for three more squares, and then repeat for the other two stars (four triangles sewn to four background squares per star). Press star points open. Now you will sew the other star point on each of the four background squares.
Sew a 1/4" seam, and press points open.
You should have 16 blocks that look like this. Now you will trim the excess fabric.
I turn my block over, and trim following the background square. If your background square is darker than your star points fabric, you may want to trim your background square after you have trimmed the excess fabric from the point. Be sure to leave a 1/4 seam where you sewed your point down.
You will have 12 star points. Now you lay out your block. You can lay it out any way you like, or you can follow this layout. If laying it out in your own design, I find it helpful to layout the stars first, and fill in the background fabric.
Sew your squares into rows, press your seams open or to the side, depending on your preference, and sew your rows together.
That's it! One block down! Please let me know if you have any questions!
Thursday, January 16, 2014
Wonky Star 16 patch: Tutorial
Welcome! Today I am going to share how I made the wonky star 16 patch blocks I used in my Wonky Star Sketch quilt.
Materials: 5 squares for your star, 15 squares for your background (one FQ is plenty, depending on how big you want your stars).
For this tutorial, I cut all my squares to 2.5", but in the quilt they were 3.5." 3.5" squares will give you a 12.5" finished block.


Materials: 5 squares for your star, 15 squares for your background (one FQ is plenty, depending on how big you want your stars).
For this tutorial, I cut all my squares to 2.5", but in the quilt they were 3.5." 3.5" squares will give you a 12.5" finished block.
Take 4 of the squares for your star, and cut them in half on the diagonal.
Place one triangle on a background square, right sides facing. This is where your 'wonky' come in - you can place it at any angle you like, just be sure that after you sew a 1/4" seam your star point covers your background fabric.
Repeat for three more squares. Press star points open. Now you will sew the other star point on each of the four background squares.
Check that you will cover the background fabric, sew a 1/4" seam and press open.
You should have 4 blocks that look like this. Now you will trim the excess fabric.
I turn my block over, and trim following the background square. If your background square is darker than your star points fabric, you may want to trim your background square after you have trimmed the excess fabric from the point. Be sure to leave a 1/4 seam where you sewed your point down.
Now you get to lay out your block.
I like to build my star first, and then fill in background fabric around it.
The great thing about this block is that you can lay it out this way, and then turn the block after your rows are sewn together to have your stars appear in different corners!
Sew your blocks into rows, and press your seams in opposite directions or open, depending on your preference. Sew your rows together and voila! You have a wonky star 16 patch! Make more and make a quilt! If you want to make a quilt like mine, you will need a FQ of each background fabric (I used 20), and 1 yard of star fabric. This would be a fun block to make scrappy as well!
Please let me know if you have any questions! I would love to see blocks you make using this tutorial!
Wednesday, January 15, 2014
WIP Wednesday
I haven't had a lot of sewing time this week, but I have been pulling fabric for projects!

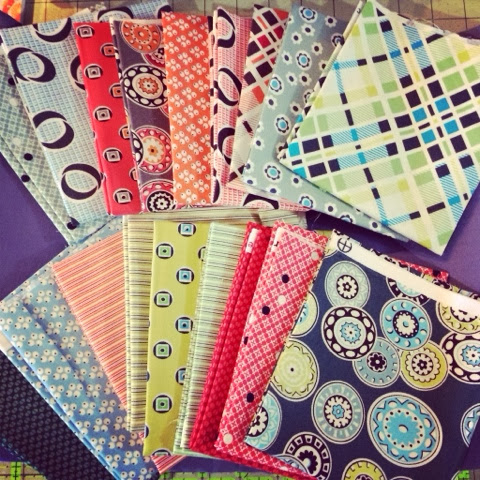
This lovely stack is my color selection for our guild's BOM challenge this year - I am really excited to see it come together!

I am pairing these lovely Art Gallery fabrics with Kona Sage to make a quilt for a gift.

And I am determined to make myself a Swoon quilt this year, using Florence and Kona Coal.
When I have had a few minutes to sew, I've been working on my Dancing Stars quilt, which I cut all the fabric for and printed all the sheets last summer. It has been the perfect project to work on when I only have stolen moments to sew.
I am hoping to get lots of sewing done on Monday when hubby is home - fingers crossed!
Tuesday, January 14, 2014
2013 Wrap Up
I'm a bit late to this train, but I did want to talk about my favorite things I made in 2013. Of course, our sweet babe is the best thing I made this year. Isn't he adorable?
But my other favorite handmades are these.
I love my Tokyo Subway Map quilt. It was my last finish of the year, and I haven't even blogged about it yet!
I love hubby's Pigeon quilt!
Samantha's gingham shirt made me feel like I really knew how to make clothes now!
I can't believe I actually knit a sweater for myself this year! And one I actually wear quite a bit!
Hunter's Race Car Quilt got me over my fear of curved piecing!
And I love the way this simple patchwork quilt came out.
I can't wait to see what I get done this year!
The kids' backpacks came out so cute!
I really like the way my hat design came out. Maybe this year I will have time to knit one for myself!
Monday, January 13, 2014
Modern Half-Square Triangle Quilt-a-Long Block 71
Welcome! If you are just joining us, information about materials can be found here, and here are the previous blocks: Block 1, Block 2, Block 3, Block 4, Block 5, Block 6, Block 7, Block 8, Block 9, Block 10, Block 11, Block 12, Block 13, Block 14, Block 15, Block 16, Block 17, Block 18, Block 19, Block 20, Block 21, Block 22, Block 23, Block 24, Block 25, Block 26, Block 27, Block 28, Block 29, Block 30, Block 31, Block 32, Block 33, Block 34, Block 35, Block 36, Block 37, Block 38, Block 39, Block 40, Block 41, Block 42, Block 43, Block 44, Block 45, Block 46, Block 47, Block 48, Block 49, Block 50, Block 51, Block 52, Block 53, Block 54, Block 55, Block 56, Block 57, Block 58, Block 59, Block 60, block 61, Block 62, Block 63, Block 64, Block 65, Block 66, Block 67, Block 68, Block 69, Block 70.
Materials:
8 3.5" squares of Color A
8 3.5" squares of Color B
*note* these are the essential materials for each block, so you can cut several blocks worth of fabric at once to save time!
8 3.5" squares of Color A
8 3.5" squares of Color B
*note* these are the essential materials for each block, so you can cut several blocks worth of fabric at once to save time!
Create your blocks, following the same procedure as last week. If you need help making your blocks, please see this post. You should end up with 16 2.5" squares. Ready to lay out your block? Here we go!

ROW 1

ROW 2

ROW 3

ROW 4
After pressing, you are ready to sew your rows together! Pin, if necessary, but I find that these short rows don't require pinning.
Press one final time, and voila! Another finished block! Only 1 to go! Remember to add your blocks to our flickr group!
Please, if you have questions, email me at knitnlit AT gmail DOT com, or make sure you leave your email address in your comment. I've had several folks ask questions in the comments, but if you are a no-reply commenter, I can't email you back.
Please, if you have questions, email me at knitnlit AT gmail DOT com, or make sure you leave your email address in your comment. I've had several folks ask questions in the comments, but if you are a no-reply commenter, I can't email you back.
Subscribe to:
Posts (Atom)