Supplies: You will need fabric scraps, and batting scraps. Additionally, you will need the hardware for the key fob and needle nosed pliers. I ordered my hardware from Bree's Basement, and they shipped the next day and were here super quick. I will be ordering from her again!
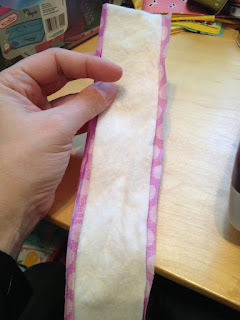
First, cut your batting and fabric the size you want. I like to make a 10" and 7" length for my fobs - the 10" fits better around your wrist, and the 7" fits better in your pocket, if you are like me and always stick your keys there. If you order the 1" fobs, you will need to cut your fabric to 2.5" x the length you want (10", 7" or something else). I cut my batting to the same length, and to just shy of 2" wide.
Next, you will need to iron down both long sides of your fabric about 1/4". *If you want to use labels, sew your label on before the next steps.* Your batting should fit comfortably in the middle of the fabric now (between the folds). If it does not, you can trim off a bit more.
Fold your fabric in half, with the ironed folds matching. You may want to pin at this step, to make the sewing easier. I hold it with one hand, and sew very slowly. Sew as close to the fold as you can - about 1/8" from the fold lines.
Continue by sewing on the other side (to match the edges), and add as many quilting lines as you need down the center of the key fob. I usually end up with four lines - two on each edge and two in the middle. I try to sew the middle lines about 1/4" away from the outside lines and from each other.
Now you will attach the hardware. This is made much easier if you have an additional set of hands to help you hold everything. If you can, wrap the ends of your pliers in duct tape - this will keep them from slipping off the hardware, and will keep them from scratching the hardware. Plus, duct tape is easily removable.
Fold your length of fabric in half and match your ends. Trim any loose threads and apply fray-check to the ends.
If you used a label, you may want it to be on the inside of the fob, so keep that in mind when positioning everything. Slide the ends of the fabric into the opening of the fob - I like to keep the little holes on the back of the fob.
Pinch both sides of the hardware down, and then press firmly in the middle to tighten everything up. Voila, that's it! You're done! Now make a million more for teacher gifts and stocking stuffers!


Thank you so much for this! I love it!
ReplyDelete