Monday, September 30, 2013

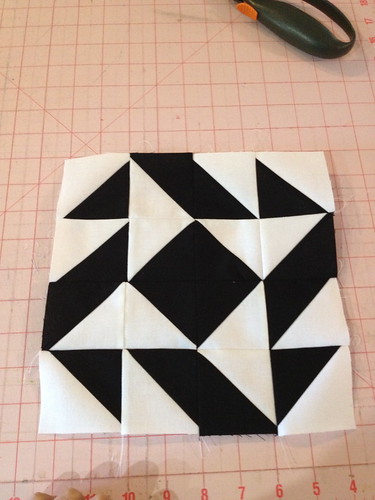
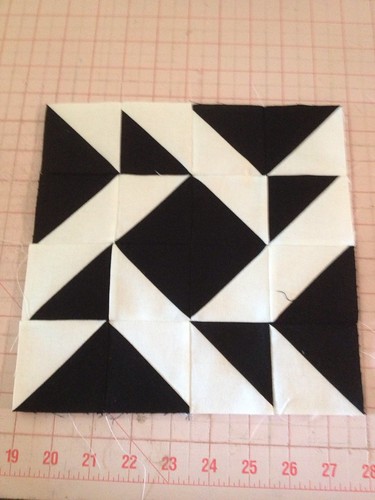
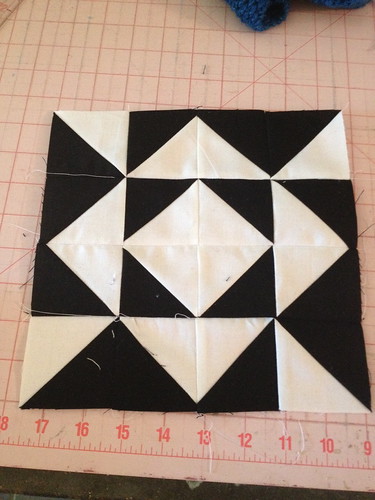
Modern Half-Square Triangle Quilt-a-Long Block 56

Welcome! If you are just joining us, information about materials can be found here, and here are the previous blocks: Block 1Block 2Block 3Block 4Block 5Block 6Block 7Block 8Block 9Block 10Block 11Block 12Block 13, Block 14Block 15Block 16Block 17Block 18Block 19Block 20Block 21Block 22Block 23Block 24Block 25Block 26Block 27Block 28Block 29Block 30Block 31Block 32Block 33Block 34Block 35Block 36, Block 37Block 38Block 39Block 40Block 41Block 42Block 43Block 44Block 45Block 46Block 47Block 48, Block 49Block 50Block 51Block 52Block 53Block 54Block 55.

block 56


Materials:
8 3.5" squares of Color A
8 3.5" squares of Color B

*note* these are the essential materials for each block, so you can cut several blocks worth of fabric at once to save time!

Create your blocks, following the same procedure as last week. If you need help making your blocks, please see this post. You should end up with 16 2.5" squares. Ready to lay out your block? Here we go!


ROW 1


ROW 2


ROW 3


ROW 4

After you have sewn your squares into rows, press your seams. I like to press odd numbered rows to the left, and even to the right. It helps to use a small piece of paper to number your rows. I like the tiny post-it notes. 

After pressing, you are ready to sew your rows together! Pin, if necessary, but I find that these short rows don't require pinning.

block 56


Press one final time, and voila! Another finished block! Only 16 to go! Remember to add your blocks to our flickr group!

Please, if you have questions, email me at knitnlit AT gmail DOT com, or make sure you leave your email address in your comment. I've had several folks ask questions in the comments, but if you are a no-reply commenter, I can't email you back. 

Monday, September 23, 2013

Modern Half-Square Triangle Quilt-a-Long Block 55

Welcome! If you are just joining us, information about materials can be found here, and here are the previous blocks: Block 1Block 2Block 3Block 4Block 5Block 6Block 7Block 8Block 9Block 10Block 11Block 12Block 13, Block 14Block 15Block 16Block 17Block 18Block 19Block 20Block 21Block 22Block 23Block 24Block 25Block 26Block 27Block 28Block 29Block 30Block 31Block 32Block 33Block 34Block 35Block 36, Block 37Block 38Block 39Block 40Block 41Block 42Block 43Block 44Block 45Block 46Block 47Block 48, Block 49Block 50Block 51Block 52Block 53Block 54.

block 55


Materials:
8 3.5" squares of Color A
8 3.5" squares of Color B

*note* these are the essential materials for each block, so you can cut several blocks worth of fabric at once to save time!

Create your blocks, following the same procedure as last week. If you need help making your blocks, please see this post. You should end up with 16 2.5" squares. Ready to lay out your block? Here we go!


ROW 1


ROW 2


ROW 3


ROW 4

After you have sewn your squares into rows, press your seams. I like to press odd numbered rows to the left, and even to the right. It helps to use a small piece of paper to number your rows. I like the tiny post-it notes. 

After pressing, you are ready to sew your rows together! Pin, if necessary, but I find that these short rows don't require pinning.

block 55

Press one final time, and voila! Another finished block! Only 17 to go! Remember to add your blocks to our flickr group!

Please, if you have questions, email me at knitnlit AT gmail DOT com, or make sure you leave your email address in your comment. I've had several folks ask questions in the comments, but if you are a no-reply commenter, I can't email you back. 


Friday, September 20, 2013

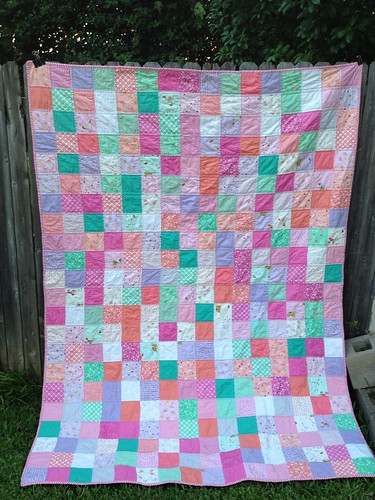
Ellie's Quilt - Finish it up Friday!

I am so glad to have this quilt finished! I started this way back in the spring, and basted it after the baby was born. I actually quilted it a few weeks ago and it has just been waiting for binding!

Ellie's quilt

I used a fat eighths bundle of Posy, but that wasn't quite enough fabric, so I took the bundle with me to MadTosh and matched solid Konas to the colors in Posy. I ended up with six solids, and I really like the way they coordinate with the prints.

Ellie's quilt

I used a print from JoAnn's for the backing that coordinates perfectly, and a tiny chevron for the binding (also from JoAnn's).

Ellie's quilt

Now to buy her big girl bed so we can put this on it!

Thursday, September 19, 2013

B is for Ballet, Balloons and Birthday!

Today is Samantha's fifth birthday! I really can't quite believe it. I'm excited about all that she is learning at school, and how much she has grown, but I want to keep her my baby too.

She had her birthday celebration at school yesterday, so she wore her B outfit.

B is for


In this case B was for Birthday, Balloons and Ballet! I made her a cute '5' shirt using some adorable Sarah Jane fabric with Balloons (because b, of course!).

B is for

B is for

And B is for Ballet, and the cute skirt I made using some of Ann Kelle's Girlfriends fabric. Skirts and t-shirts is one of her favorite outfits, so while I want to make her lots of dresses and tops, I know this combo will show up several more times during the sew-along!

Wednesday, September 18, 2013

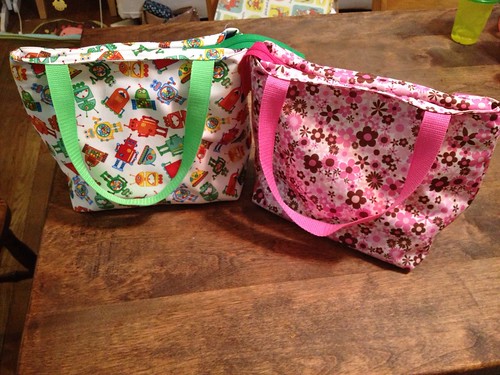
Quick Zip Lunch Bags


Last year, I used Erin's at Dog Under My Desk's Quick Zip Lunch Bag pattern to make Samantha's lunch bag.  She loved her lunch bag and it is still going strong one year later! I have even washed and dried it several times, and it really is showing no wear. With Ben and Ellie going to school this year, I needed to make two more, and when Erin asked for folks to participate in her blog hop, I said I would be happy to! 

Lunchboxes

I followed many of the mods I had made for Samantha's lunch box - I used PUL for the outer and lining fabrics, used nylon for the handles, and lined it with insulbrite again. 

Lunchboxes

I did make some additional mods this time - I eliminated the pocket, as it wasn't big enough for the new ice packs I had purchased this year. I could have made it bigger, but since I was making the lunchbox bigger (my other mod), I wanted the ice pack on the bottom. 

Making the lunch bag bigger was my major mod. I could barely fit Samantha's sippy cup in her lunch box last year, and I had purchased 'bento' boxes for them to use this year, so they needed to be bigger to accomodate the boxes. 

To make them bigger I simply cut a piece of paper 2" wide and as long as the pattern pieces, and taped it in between the pattern pieces when I assembled the pattern - I made it two inches taller and longer. This is a very easy mod to do, and it still made the pattern ‘work’ if that makes sense! :) 

Lunchboxes

I really love their bags - they are a great size now, and so very usable. Erin’s patterns are wonderful - her tips for interfacing and zipper installation can’t be beat. Lots of pictures for those of us who are visual learners and easy to assemble patterns. I highly recommend this one! 

To celebrate Erin's blog hop I am giving away a PDF copy of this pattern! Leave a comment telling me your favorite kind of bag to make! Make sure that you include your email address if you are a non-reply blogger. I'll draw a winner Friday night! And hop on over to Erin's post to win some other bag necessities!

Edited to add: The Random number generator chose #13!

So cute! Nice pattern! I would love to try it!

Tuesday, September 17, 2013

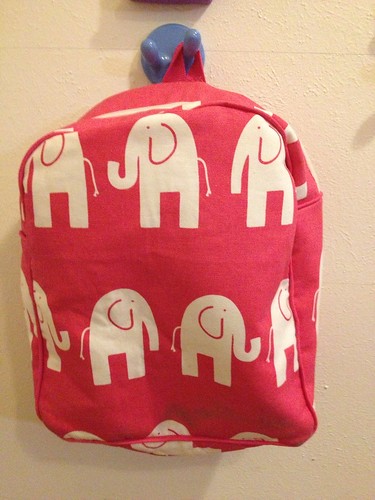
Back to School Backpacks

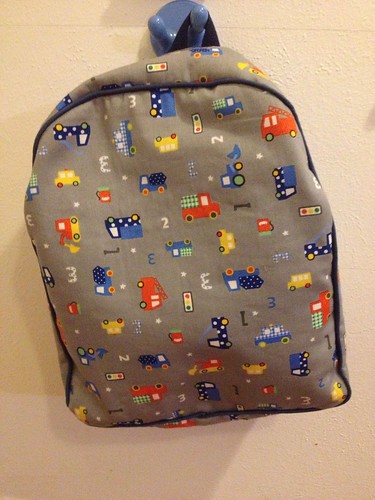
With Ben and Ellie headed to preschool this year, I needed to make them both backpacks! I loved making Samantha's last year, so I knew I wanted to make theirs this year. I searched around a lot for cute fabrics for them that were home dec weight - I found several cute ones, but they had too much white and white+kid+backpack=dirt!

Untitled

I finally found some cute prints on Etsy and ordered them right away! I have enough left of both to make another of each print, so I may make more sometime! (Always need a backup, right?) I used Rae's Toddler Backpack pattern, upsized to fit a folder.

Untitled

I did make a few changes for their backpacks that I didn't make for Samantha's. I used fusible fleece to give the backpacks some shape - Samantha's is so floppy that her folder bent in half last year. I also lined theirs to make them look nice on the inside. I plan to go back and line Samantha's and add fusible fleece to the lining to help give it more body.

Untitled

Untitled

We made a little 'mud room' in our entry hall and hung these cute hooks I found at IKEA. In order to reduce fighting, I hung letters above the hooks so each kiddo has their own hook. Voila!

Untitled

Monday, September 16, 2013

Modern Half-Square Triangle Quilt-a-Long Block 54

Welcome! If you are just joining us, information about materials can be found here, and here are the previous blocks: Block 1Block 2Block 3Block 4Block 5Block 6Block 7Block 8Block 9Block 10Block 11Block 12Block 13, Block 14Block 15Block 16Block 17Block 18Block 19Block 20Block 21Block 22Block 23Block 24Block 25Block 26Block 27Block 28Block 29Block 30Block 31Block 32Block 33Block 34Block 35Block 36, Block 37Block 38Block 39Block 40Block 41Block 42Block 43Block 44Block 45Block 46Block 47Block 48, Block 49Block 50Block 51Block 52Block 53.

Block 53


Materials:
8 3.5" squares of Color A
8 3.5" squares of Color B

*note* these are the essential materials for each block, so you can cut several blocks worth of fabric at once to save time!

Create your blocks, following the same procedure as last week. If you need help making your blocks, please see this post. You should end up with 16 2.5" squares. Ready to lay out your block? Here we go!


ROW 1


ROW 2


ROW 3


ROW 4

After you have sewn your squares into rows, press your seams. I like to press odd numbered rows to the left, and even to the right. It helps to use a small piece of paper to number your rows. I like the tiny post-it notes. 

After pressing, you are ready to sew your rows together! Pin, if necessary, but I find that these short rows don't require pinning.

Block 53

Press one final time, and voila! Another finished block! Only 18 to go! Remember to add your blocks to our flickr group!

Please, if you have questions, email me at knitnlit AT gmail DOT com, or make sure you leave your email address in your comment. I've had several folks ask questions in the comments, but if you are a no-reply commenter, I can't email you back.