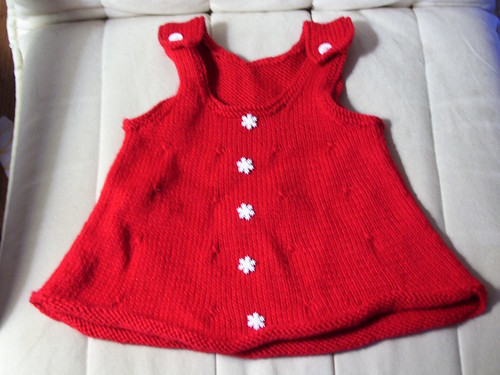
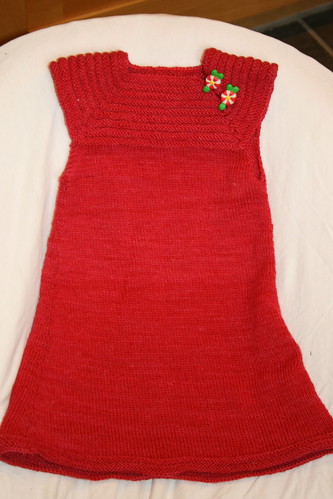
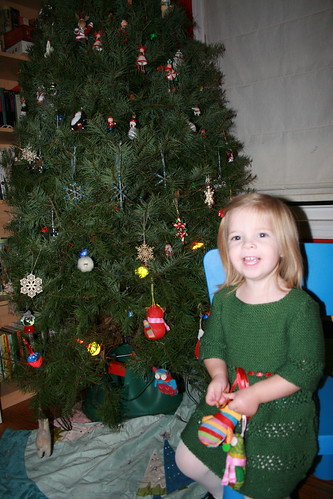
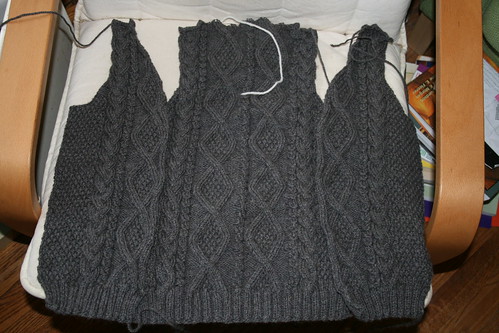
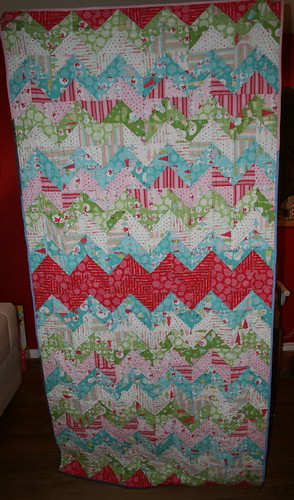
For my last Christmas in July post, I thought I'd share with you the holiday-related clothing I've made over the years.
I blogged about the kid's jammies here, but here are last years.
I also have made the kids a Christmas 'outfit' to wear on Christmas day (and for our holiday photo for our Christmas cards).
2008
2009
2010
2011
Now that the kiddos have multiplied, I'm sure I'll be sewing more and knitting less when it comes to these outfits. I have no idea what I'll do this year, but I'm keeping my eyes open for cute fabric!
Tuesday, July 31, 2012
Monday, July 30, 2012
Ravhellenic Games
It's Olympic time again (wait, am I allowed to say the word anymore? Too many rules!)
As in years past, I am planning to knit along again (hopefully my knitting won't harm the athletes. I do worry about denigrating them). However, this year I am planning to just finish something. Because last Olympics I didn't medal (my item wasn't finished). And long it has sat, these past two years. And now it will cross the finish line.
All it needs are sleeves and a button band. I can do that. Maybe I can even finish my Tangled Yoke sweater while I'm at it.
Friday, July 27, 2012
MadTosh Crafts
At the end of April, our long winter of no LYS in my area came to an end. MadTosh Crafts opened it's doors and a sigh of relief went up around western Tarrant County (OK, let's face it, probably most of North Texas, as there is a lot of really beautiful Madelinetosh Yarn in this store!). They carry both yarn AND fabric, so it is doubly dangerous for me!
I had been missing teaching knitting classes, so I emailed Amy (the owner) and I am happy to be their newest knitting instructor! So far we've had classes on the classic Baby Surprise Jacket, and the Springtime Bandit. Next month we have classes on the newly popular Leftie shawl, a Knitting 101 class, and an introduction to cabling class. September classes are tentatively going to cover Top-Down sock knitting 101, the Effortless Cardigan and the Gift Wrap Sweater (an adorable baby sweater).
I am enjoying teaching so much - I love getting others excited about knitting!
Thursday, July 26, 2012
Tree Skirts
I have had grand visions of making a tree skirt for our Christmas tree. And each year, I have too many other things going on to get it finished. First I was going to knit one - so lovely! Cables, and texture. Yum. But let's face it, I barely knit blankets, so no way was I knitting something that would be used for approximately 30 days a year.
And then I started quilting and now I can't decide what kind of tree skirt to make! There are so many amazing choices!
I love this one with the adorable houses. So cute. And this one with the trees.
So I'm thinking maybe a mash up of houses and trees. So cute. Now to sketch it, and plan it, and then actually find the time to sew it.....
PS: I totally can't wait for this line of fabric to come out - I'm seeing holiday bunting with the gnomes!
Wednesday, July 25, 2012
Blue Daisy Dresses
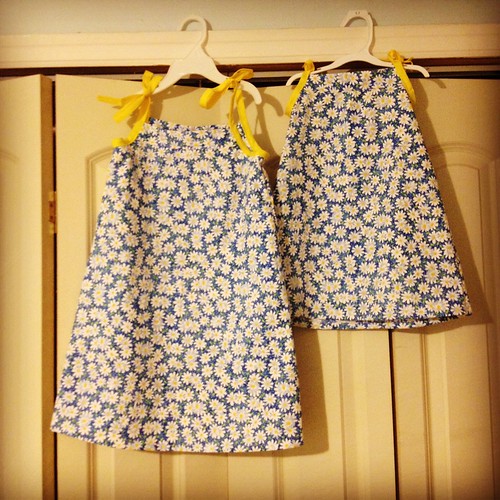
For the Fourth of July I wanted to make the girls something cute to wear. But I didn't want to make something that would be restricted to just the 4th. I also didn't love any of the holiday prints at JoAnn's. I did like this daisy pattern, and I had been wanting to make the Oliver+S popover sundress pattern for a while.
I finished them up in a naptime (I cut them out before nap, though I probably would have had plenty of time to do that too), which is always a win in my book! I used yellow pre-made bias tape instead of making my own. I dislike making bias tape, and avoid it if I can! I also like how the yellow of the straps pulls the yellow bits of the daisies out.
Simple pattern, and super cute! They (really Samantha as Ellie doesn't have opinions about these things yet) love matching, and it is pretty fun to make a big and a tiny version of each outfit.
Friday, July 20, 2012
Granny Square Quilt
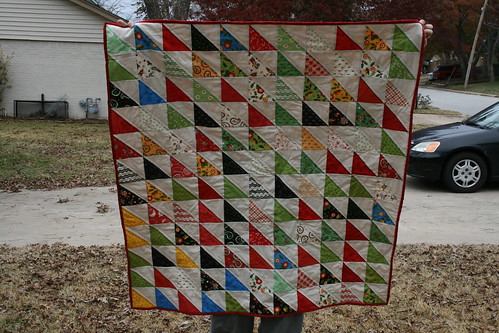
When I saw the Granny Square Quilt pop up on Pinterest, I knew I had to make one! I loved the block design, and all the different ones that started popping up in blog land and on flickr. I have been hoarding the DS Quilts fabrics from JoAnn's, and when I dug them all out, I found that most of them were blues and greens. I decided to use my few warm colors as the center squares and alternate the blues and greens for the inner and outer circles. I used Kona White for the triangles and the sashing. I used two Flea Market Fancy prints, and made two scrappy blocks to end up with 25 blocks.
I don't have a close-up shot of the quilting, but I did straight lines through the outer blocks within each block, so the lines run perpendicular to the blocks, which I like.
I used a large piece of one of the Picnic and Fairgrounds line for the backing, with some Kona Navy, which I also used for the binding.
I love how summery and picnic-y this one feels!
Thursday, July 19, 2012
Holiday Table Decorations
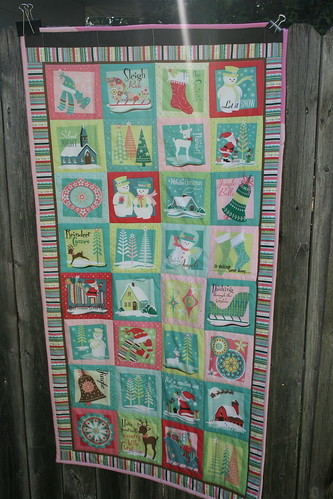
I bought this panel years ago - it was so cute, I couldn't pass it up! I loved the retro feel and the non-xmassy colors. But then it sat. And sat and sat and sat. I just didn't know what to do with it, and didn't want to 'waste' it. However, when I opened up my holiday fabric box this week, I rediscovered it, and decided it was time to put it to use. I chose another holiday fabric to use as backing, found a scrap of batting the correct size, and basted it simply. I quilted around the squares, and machine bound it using leftover binding from other projects.
I think it will be cute on our dining room table during the holiday season!
Wednesday, July 18, 2012
Baby Sweaters
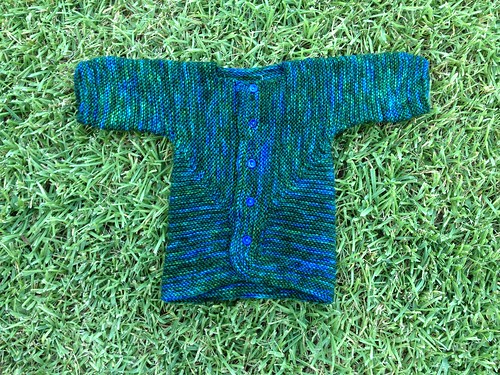
When I found out that we were having twins, I set into crafting overdrive (as soon as I hit the second trimester, and I could stay awake past 7 pm). I wanted to knit all.the.things for the babies. Of course, my crafting eyes were bigger than my crafting stomach (shouldn't there be a better expression for that?). Both of these first two sweaters were abandoned when it became obvious that by the time I finished them they wouldn't fit my kids.
If you follow me on twitter or instagram (knitnlit), you saw my 'sleeve project' where I knit up a lot of sleeves over 2 weeks. Because these sweaters were only lacking sleeves. Crazy.
Pattern: Baby Bartlett Set
Yarn: Fortissima Cotton (long discontinued, I believe)
This one stalled because I wasn't sure I liked the striping on the sleeves. But I decided to push on, and I think it looks fine. It will now be put away for a someday baby boy.
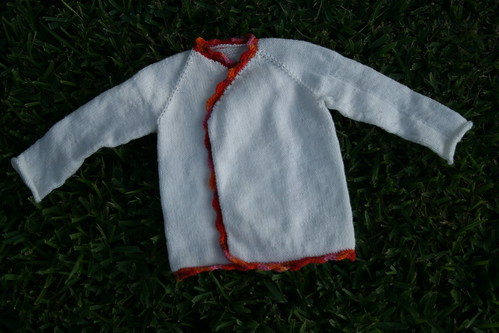
Pattern: Milk Infant Top
Yarn: Berroco Comfort and scrap sock yarn for the edging
This was a quick and easy knit, but it looks way too small (this is supposed to be the nine month size, but I think it's closer to 0-3). This one stalled because of the crochet edging. I had a friend help me figure out how to do it, but then it was Christmas and I put it away. I dug it out and figured out how to do it myself, and it worked! I am not a strong crocheter, so I was very proud that it actually looks like it is supposed to!
These two sweaters I started for Samantha, but she outgrew them before I finished. They'll now fit other babies!
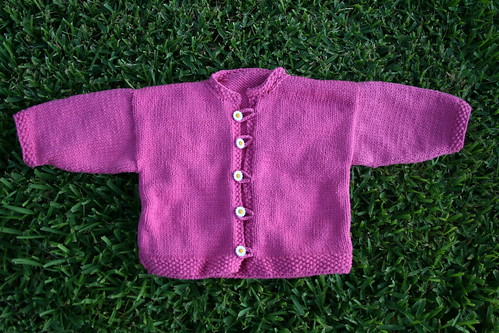
Pattern: Flower Cardigan
Yarn: Lion Brand Cotton Ease in Bubblegum (old color)
I thought this would be a simple sweater for me to knit, and it was, but for some reason it got put down, and forgotten about. I decided to forego the flower on the front in favor of these cute flower buttons.
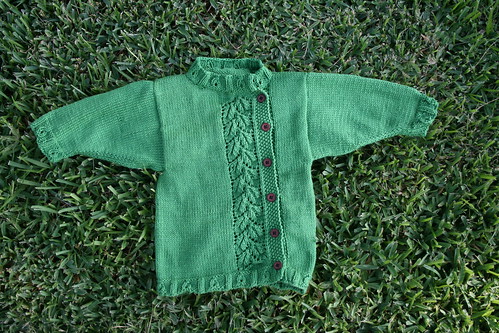
Pattern: Pea Pod Baby Sweater
Yarn: Knitpicks Shine Sport in Grass
I loved this pattern, and had started it years ago. I was knitting merrily along, until I started the second ball of yarn and it was a visibly different dyelot. I was frustrated, so I put it away. I pulled it out a few months ago and knit up the fronts and back. And then it sat again. So on sleeve week I dug it out and finished the sleeves. It is super cute, but huge. This one will fit someone, someday!
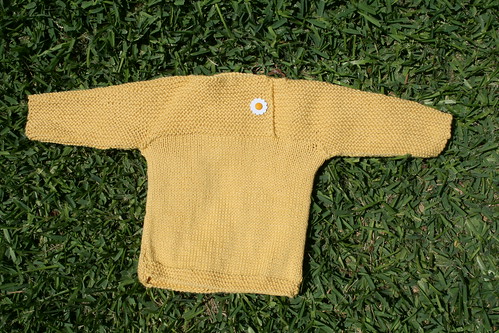
And finally, a more recent start (and finish). My mom had given me some yarn leftover from one of her projects. I needed something simple, and wanted to use up the stash. I saw this pattern, and thought it would work well. It was a little bit confusing, but I trusted my gut, and it turned out really cute! I think Ellie will be adorable in this this winter.
Whew! That's a lot of sweaters! I hope to finish one more baby sweater this month, then on to some adult sweater finishes!
Tuesday, July 17, 2012
Christmas Quilts
I love Christmas. I love giving gifts, and showering my family and friends with love via gifts. But I also love decorating for the holidays. But I don't need 50 Christmas quilts. So I buy Christmas fabric I love and make quilts for other family members. I used my tutorial to make this quilt for my mother-in-law a few years ago.
The fabric was Fruitcake by Moda (by Basic Grey?).
I made this quilt for my mom (first blogged here). I love this one.
And this quilt for Samantha (blogged here). I really need a better picture of this one.
I'm working on a quilt for Ben (that I hope to share with you before the end of the month), and I just opened my box of Christmas fabric to find 3 charm packs of Kate Spain's 12 Days of Christmas - a quilt for Ellie? Yay for stash!
Monday, July 16, 2012
A slice of life
We had a busy weekend. We got coerced into dressing up like cows to get a free meal at Chick-fil-a. Aren't we cute?
Our nephew turned nine, and there was a bounce house and cake.
I taught my first knitting class in several years at Madtosh Crafts. I am excited to have a LYS again, and very excited to be teaching again!
And it actually rained. In July. In Texas. Bizarre.
What did you all do this weekend?
Thursday, July 12, 2012
O Christmas Tree
Sorry today's post is late getting up - somehow I thought it was Wednesday for much of the day today! Oops!
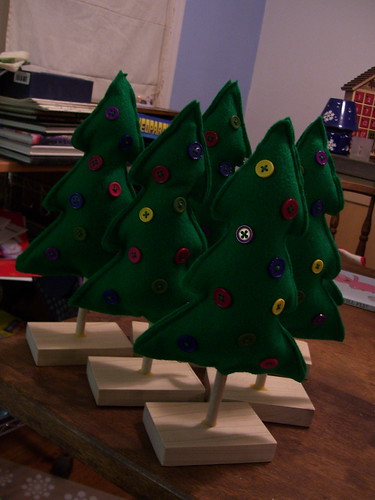
Today we're all about Christmas trees - but these won't drop needles all over your floor or fail to fit back into their box at the end of the season. Best of all, these trees cost pennies!
We made these trees several years ago. They were inspired by a tree I had received as a gift a few years ago. I thought it was cute and could be something I made as a family Christmas gift. This project was a collaboration between hubby and I - he cut the wood for the bases and glued down the dowels. I sewed up the trees, added the buttons and stuffing and stuck them onto the dowels!
I don't have a picture-filled tutorial, but this is what we did.
I found an outline image of a Christmas tree that wasn't too big. I bought a lot of green felt (way way way too much actually - I'm still trying to use it up!). I cut two trees out of the felt for each tree I wanted to make. Next I added buttons - I like the favorite findings buttons because you can get lots of them in different colors, but you can use any buttons. I sewed them all on by hand (this was the step that took the longest - we made 12 trees I think? It was a lot of buttons).
Next I sewed the trees together, wrong sides facing - I left a small opening at the bottom for the dowel, and added some stuffing. Then I used glue to attach the tree to the dowel - a little on the tip of the dowel, and the rest at the bottom. I can't remember if I used tacky glue or hot glue, but either would work!
Last Christmas, I made a few more trees - I have this vision of a little forest display with lots of different kinds of trees. I needed some more, so I added these.
You'll need styrofoam tree forms (I found mine at the dollar store!), and green yarn. I used leftovers from my stash, but any would be fine. I found wool to stick better.
The first tree I sort of did 'improv' style - I just wrapped the yarn around until I felt like it was covered. It was OK. The second tree I tried to make neat rows of yarn. This was difficult. The third three I used two strands of yarn and did the improv thing again - much better! I like this one best.
I also decided to add some sewn and stuffed trees. I had seen some online years ago, and wanted to make some, but failed to grab the pattern when it was available. Of course, it has since been taken down. And now that I'm writing this post, I'm having trouble finding that one I used six months ago! However, I did find another similar pattern for you - it is a bit shorter than what I used, but you could easily modify it.
I used scraps of green fabric, but these would be cute in a variety of colors. Mine don't lean as much now as they did, but some weights in the bottom of your tree would help with that. These now live in Ben and Ellie's nursery, but I imagine they'll come back out for the holidays.
Wednesday, July 11, 2012
WIP Wednesday
I've got many irons in the fire this week. I decided at the end of June that I needed a new quilt project to take to my guild's sewing Saturday. But, as usual, I had trouble deciding what to start. So I cut fabric for three quilts. Usually I work on one, maybe two at a time. And I don't like my quilt tops to sit around for very long before they get turned into quilts.
This is an unusual amount of WIPs for me-guess I'll chalk it up to the heat getting to me. :)
I cut lots of tiny squares for a quilt I'm planning from nothing but my sketchbook. I've only done this a few times, and this one I'd like to write up a tutorial/pattern for, so I'm a bit nervous about it.
I basted my granny square quilt-looking forward to some quilting time this weekend!
I also started the crosses quilt from Modern Log Cabin quilting, and the snapshots quilt from A Practical Guide to Patchwork. Hoping to get at least one more quilt top done this week!
Linking up with WIP Wednesday!
Tuesday, July 10, 2012
Summer Pinterest Challenge
I'm joining in with the Pinterest Challenge hosted by Young House Love again this quarter. Last time I painted letters for our reading corner (I need to update that post with the finished letters hung on the wall - they look great and I love the little punch they added to our corner!) This time I made us a calendar.
I had an idea for a chore chart that used magnets a few months back (inspired by these), but for our whole family. Instead of ordering them, I decided to make my own using printable magnet paper. I got them all made up and then my computer ate my file. Fast forward a few months, and I saw this pinned on pinterest and thought the idea was great. Samantha is always asking me when we are doing something, and doesn't have a good grasp of what a "day" is, so this seemed like it could help.
I picked up a magnet board at ikea, and dug around in my stash of goodies for the rest. I found letter stickers from Target (Dollar Spot!), and decorative scrapbook tape. (I had planned to use some of that cute washi tape that I've seen people say they got at Target, but I can't find it. Maybe only Super Targets have it?)
I didn't have enough capital letters to use for every day of the week (because I bought these weeks ago for no real reason, and they don't have more now), and they looked silly next to the lowercase letters, so I decided just to use the lowercase letters.
I measured the board and divided it by seven. It was 30", so I divided it into 4" sections with 2" leftover for the extra magnets at the bottom.
I used small pieces of tape to mark off the sections while I did the words, and then went back and added the row of tape across the entire board.
I went back to the computer and grabbed some clip art for the things that are part of our routine. I wrote underneath them, and printed them out! Unfortunately, my printer seems to hate me and refused to print in color (even with a new cartridge - grr!). So they are black and white, but I can go back and add some color with markers later if I want (which I think I am going to do, because it's kind of drab).
I cut these and the words for our chores apart, and slapped them down! I hadn't had a chance to go by JoAnn's and get a cute wooden star or other marker for what day today is, so I grabbed a foam star leftover from our Fourth of July crafts, and stuck it up there. So, I guess this is still a little bit of a work in progress, but things usually are around here!
We hung it with tiny command hooks so that we can move it (and yes, hubby hung it crooked. It will be fixed as it's driving me crazy!).
All told, this project cost us $24 dollars, but we have three sheets and a bit leftover of magnet paper, and tons of leftover letter stickers, so I don't think it was too bad. Cheaper than buying something someone else made! I'm sure this will change over the years too - I'm already thinking those letters are too small, and might have to be replaced. We'll see.....
What have you been pinning and making lately? We've recently done a bunch of projects inspired by pinterest, and I need to share them!
Quick and Easy Christmas Quilt Tutorial
Today I've got a great, very easy tutorial for you on making a quick quilt from charm packs! This is a great project for anyone new to quilting, and can be made with any fabric.
Supplies:
3 charm packs of your choosing
Sewing machine, thread, bobbin, scissors
Backing fabric - two yards
Binding fabric - half yard
Batting - a piece at least 42"x 65"
Supplies:
3 charm packs of your choosing
Sewing machine, thread, bobbin, scissors
Backing fabric - two yards
Binding fabric - half yard
Batting - a piece at least 42"x 65"
Directions
Take the papers off of your charm packs. Holding them over the trash can, give them a good shake - this helps get all the little bits and fuzz off so you don't get them all over you! After their shake, place them in some type of basket or container.
I usually use a larger basket than this, but this was what I had available. Mix them up, if possible. Choose 14 squares and set them aside. Make sure they are a variety of prints.
Now you will start chain piecing your squares. Choose two squares and place them rights sides together, with the edges aligned.
Sew your squares together with a 1/4" seam allowance. When you finish sewing one set of squares, place another set under your presser foot and continue sewing. Leave a small gap between sets. You don't have to stop and remove the first set of squares. Continue in this manner until all sets are sewn together. You will have one big long chain of pairs of squares. You should have 56 sets. Now you will trim the threads between the sets. I find a small pair of embroidery scissors works well for this, but you can use any scissors. Take care to not cut your fabric!
Now you will do the same thing with your sets of two - choose one set, and another, place them together and sew them up, right sides facing and edges aligned. Chain piece your sets of two into sets of four. You will end up with 28 sets of four when you are finished.
Carefully cut them apart as before. Now you will pair up your sets of four, and sew them together, right sides facing, edges aligned. Chain piece these sets. You will have 14 sets when you are finished. Trim them apart as before.
Now grab those 14 squares we set aside. Sew one of those squares to either end of each of your rows of 8. You can chain piece these as well. Trim them apart as before.
Lay out your rows and choose a pleasing arrangement. Press your seams - I like to press mine in opposite directions to 'lock' my seams and make them not as bulky when I am sewing my rows together. So I press one row of seams to the right, and the next to the left, continuing in this manner until all 14 rows have been pressed.
Now you will sew your rows together. Take time to match your seams, and use pins to help you align things! Go slowly. There is room for adjusting if you've made small errors in piecing (which I always do!). Take your time - this is the most difficult part, I think!
When your rows are assembled into a top it is time to baste, quilt and bind! There are many many resources available for how to do any of these things. I like to pin baste (I would put at least one pin in each square), I quilted this quilt with diagonal lines through the corners of each square, and I use 2.5" or 2.25" binding strips.
Now gift your quilt! This is a great way to give a special gift that doesn't take months to make. Two charm packs make a good size baby quilt as well!
Sunday, July 08, 2012
Quilting Blocks
I recently joined the Fort Worth Modern Quilt Guild, and they are doing a block of the month project. I haven't made a quilt where each block is different (a sampler quilt), and most of these blocks are totally out of my comfort zone, so I decided I would join in to try to push myself.
I decided to use solids, in an effort to not worry if I ran out of a print. I chose three colors, and added white. We're doing the Sew Mama Sew blocks of the month. Because the guild recently formed, we are running a few months behind.
July
August
September
October
November
I haven't started on this month's block yet, but I'm hoping to get to it this week. So far the hardest thing for me on this project has been cutting small pieces out of yardage of fabric. And so many small pieces! But I will keep going - almost half done!